
Five Products for No Makeup Makeup: Skin First, Texture Forward Kit

No-makeup makeup is a technique-driven routine built on sheer, skin-mimicking textures rather than heavy coverage. The minimal kit that produces it: a skin tint or tinted moisturizer, a cream concealer for spot coverage, a cream blush, a brow gel, and a coat of mascara or a tinted lip balm. The whole trick is thin layers placed only where you need them, never a full face of product spread edge to edge.
TL;DR:
Using a sheer, breathable base like a skin tint or tinted serum is essential to avoid a heavy or shiny appearance that can look artificial.
The order of application matters: spot conceal before applying the base, then blend with fingers and a damp sponge to maintain a natural finish.
Cream and balm textures outperform powders for this look because they integrate better with skin’s natural oils and avoid a made-up look.
Oily, dry, and combination skin require specific tweaks, such as mattifying T-zone powders or hydrating serums, to maintain a fresh appearance throughout the day.
Restraint and thin layering are more effective than adding multiple products or thick layers, which can cause greasiness, patchiness, or makeup disappearance.
Table of Contents
What Do You Need for No Makeup Makeup? The Essential Kit
You don’t need fifteen products to pull off a believable no-makeup makeup look. You need five, chosen carefully, and used in thin amounts. A minimal kit of tinted moisturizer or skin tint, cream blush, brow gel, mascara, and tinted lip balm is genuinely sufficient for most skin types and most days. Anything beyond that is optional polish, not a requirement.
Here’s what each category needs to deliver, and why texture matters more than brand name:
Sheer base (skin tint, tinted moisturizer, or serum foundation): Should sit close to your actual skin tone with a satin or soft-focus finish, never a heavy matte cake or a glassy high-shine dewy look.
Concealer: A creamy, buildable formula for spot work only, under eyes and on blemishes, not a full-face second layer.
Cream blush or lip and cheek tint: A balm or gel texture you can pat on with fingers so it blends into skin instead of sitting on top of it.
Brow gel: Clear or tinted, just enough to set hairs in place without drawing on a shape that isn’t there.
Mascara or lash tint: One coat, focused on the outer lashes, to open the eyes without adding obvious “made up” density.
Spend your money on the sheer base and the cream blush. Those two products touch the most surface area and get the most scrutiny up close, so formula quality shows. You can save on brow gel and mascara since a drugstore clear gel and a basic lengthening mascara do the job fine.
Cream and balm textures beat powder here for a simple reason: they integrate into skin’s natural oils rather than sitting as a separate layer on top, which is exactly what makes a face read as “your skin, just better” instead of “wearing makeup.” Powder blush and powder highlighter tend to sit visibly on the surface, catching light in a way that looks applied rather than biological. That’s the whole difference between soft glam and something that photographs as effort.
If you’re shopping for the sheer base specifically, look for language like “skin tint,” “tinted serum,” or “second-skin finish” on the label. Those formulas are built thinner and more breathable than a traditional foundation, which matters once you get into application.
How Do You Apply No Makeup Makeup Step by Step?
Order matters more than most people realize. Doing steps out of sequence, powdering before you’ve conditioned skin, or building base before concealing spots, is how a natural look turns heavy. Here’s the sequence that keeps every layer thin.
Cleanse gently. Use a mild, non-stripping cleanser. A gel cleanser that clears debris without leaving skin tight sets up everything that follows.
Hydrate and let it absorb. Apply a lightweight moisturizer suited to your skin type and give it a few minutes to sink in before you touch makeup. Rushing this step is the single biggest reason lightweight products slide or separate by midday.
Apply SPF and wait. Sunscreen needs time to set before makeup goes on top of it, otherwise you get pilling and patchiness. Timing SPF ahead of makeup, rather than blending them together, dramatically improves how the base wears.
Spot conceal first, before base. Dab a creamy concealer only on blemishes, dark spots, or under-eye shadows. Warm it between two fingers first so it melts rather than sits.
Apply the sheer base with fingers, then buff edges with a damp sponge. Warm a small amount of skin tint between your fingertips and press it into the center of the face, forehead, nose, chin, cheeks, then use a barely-damp sponge to blend the perimeter near the hairline and jaw. This order, spot-conceal first, then a thin veil of base, is the technique that separates a natural finish from an obviously “made up” one.
Layer cream blush as a connected flush, not two circles. Tap blush onto the apples of the cheeks, then, without reloading the product, sweep the remaining pigment on your fingertip across the bridge of the nose, the chin, and lightly onto the eyelids. This is the connected flush technique, and it works because it distributes one product across several points instead of isolating color in two spots, which is what makes cheeks look flushed rather than “blushed.”
Fill and set brows. Use short, hairlike strokes with a fine-tip brow pencil only where there are visible gaps, then brush a clear or tinted gel through to set the hairs upward and outward.
Coat lashes once. One layer of mascara, wiggled in at the root and pulled through to the tips, focused on the outer corner. Skip the bottom lashes entirely if you want the eyes to look rested rather than lined.
Set with targeted powder only. Press a tiny amount of translucent powder under the eyes and across the center of the nose with a small brush, not the whole face. Full-face powdering is what turns a soft-focus finish into a flat, dulled one.
Mist with setting spray and finish lips. One pass of setting spray to knit everything together, then a tinted lip balm or gloss pressed on rather than lined.
Pro Tip: Apply your sheer base in the order forehead, then cheeks, then chin, blending outward each time before moving to the next zone. Working section by section keeps the product from setting before you’ve blended it, which is the main reason skin tints look patchy on people who apply the whole face at once and blend last.
This sequence, prep first, spot-conceal before base, cream blush as a connected flush, and powder only where needed, mirrors the seven-to-ten step structure editors typically recommend for this look, and the logic holds regardless of which products you use: technique fixes more problems than buying a different formula ever will.
One more note on finish. Current editorial coverage of minimalist makeup favors satin and soft-focus textures over the ultra-dewy or fully matte extremes that dominated a few years back. If you’re choosing between two skin tints and one leans glassy-wet while the other settles into a soft satin, the satin one will age better across a full day and photograph more naturally in mixed lighting.
Which Products Work Best for Your Skin Type?
The kit stays the same across skin types. The formulas and a few technique tweaks change quite a bit, and getting this part wrong is why the same “simple” routine looks great on one person and greasy or flaky on another by noon.
Oily skin wants a skin tint with a natural, satin finish rather than anything labeled dewy or luminous, since oil will add its own shine as the day goes on. Mattify only the T-zone with a light powder touch, and leave the cheeks alone so you don’t lose the softness that makes the look work. Blotting papers midday beat reapplying product.
Dry skin needs a hydrating serum underneath everything, applied and given real time to absorb before the base goes on. Favor cream blush over any powder product on the cheeks, since powder grabs onto dry patches and emphasizes texture instead of softening it. Skip full-face setting powder entirely and rely on setting spray instead.
Combination skin benefits from a zone-based approach: a slightly mattifying skin tint or a light dusting of powder on the T-zone, and richer, creamier layering on the cheeks and around the eyes where skin tends to run drier. Hybrid formulas, tinted moisturizers with a satin-matte finish rather than a straight dewy or matte formula, tend to split the difference well across the whole face.
Sensitive skin calls for fragrance-free formulas across the board and a patch test on the inner forearm 24 hours before trying a new product on your face. Check ingredient lists for common irritants like alcohol denat high on the list, added fragrance, and essential oils if your skin reacts to them.
Tool choice matters as much as formula choice:
Fingers warm cream and balm products so they melt into skin, ideal for blush, concealer, and the initial press of skin tint.
A damp sponge is best for blending edges and softening any harsh lines around the hairline or jaw.
A small, dense brush earns its place only for precise jobs, setting powder under the eyes or filling brow gaps, not for the base itself.
Why Does My No-Makeup Makeup Look Greasy or Disappear?
Most no-makeup makeup failures trace back to one of three causes, and each has a fast fix.
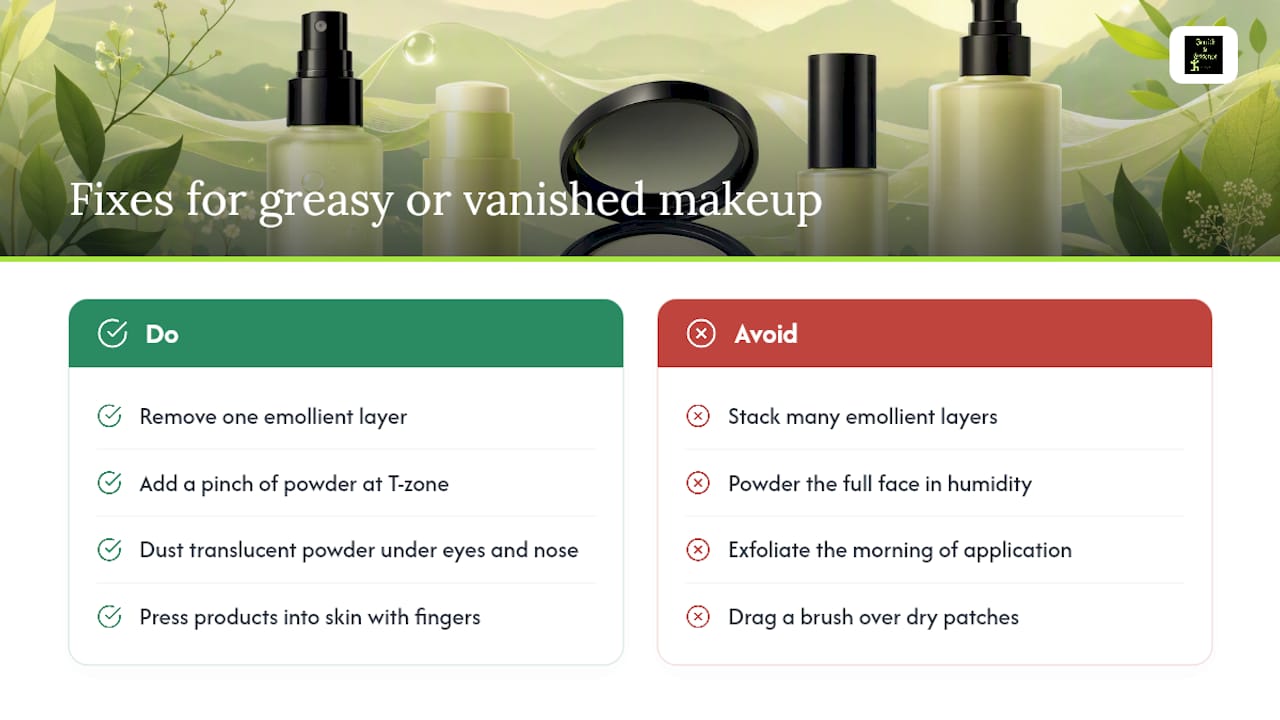
Greasy instead of glowy. If your face looks shiny rather than lit from within a few hours in, you’ve likely stacked too many emollient layers, moisturizer, SPF, and a dewy skin tint, without any anchor point. Remove one layer next time (try a lighter moisturizer or a less dewy tint), or add a pinch of powder at the T-zone before you leave the house.
Makeup disappearing by midday. This usually means your base had nothing to hold onto. Add small anchor points, a light dusting of translucent powder under the eyes and beside the nose, right after you apply base, and keep every layer thin rather than one thick pass. Editors specifically recommend this small-anchor approach over full-face powdering for humid climates, since powdering the whole face tends to look cakey rather than extending wear.
Textured or patchy finish. This points back to skin prep, not the makeup itself. Gently exfoliate the night before (not the morning of, which can leave skin reactive), and press product into skin with fingers rather than dragging it with a brush, which catches on dry patches and emphasizes them.
Climate changes the math. In humid weather, lean on the anchor-powder trick and skip heavy moisturizer layers underneath. In dry, cold air, add a hydrating mist mid-routine and favor cream blush over anything powder-based on the cheeks.
Why Zenith Curates This Way for a Believable Look
Every product Essencezenith carries gets filtered through one question: does this enhance skin, or just sit on top of it covering it up. That’s why the catalog leans toward sustainable, skin-supportive ingredients rather than heavy, opaque formulas, the same skin-first logic that makes cream and balm textures outperform powder for this specific look.
A few practical things make shopping for this routine less of a gamble:
Every product page lists full ingredients, so you can check for fragrance or alcohol denat before buying if you have sensitive skin.
Genuine customer reviews sit on each listing, useful for gauging how a shade or finish actually wears on different skin tones.
A 30-day satisfaction guarantee means you can return unused items if a shade or texture doesn’t work out.
Personalized service is available if you’re unsure which skin tint shade or blush finish suits your undertone.
For skin prep specifically, an advanced micellar water breaks down the day’s SPF and light coverage without stripping skin before your evening cleanse, and a gentle clarifying cleansing gel handles the morning reset without leaving skin tight before you apply anything. Getting that first step right is what makes every product layered on top of it behave.
The Real Bottleneck Isn’t Products, It’s Restraint
Most advice on this look obsesses over finding the “right” foundation, as if the perfect bottle solves everything. It doesn’t. The evidence points somewhere less exciting: technique and restraint do more work than any single product ever will. A $12 tinted moisturizer applied with patience and the right order of operations beats a $60 one slapped on all at once.
Where conventional advice falls short is the instinct to add more when something looks off, more concealer, more powder, another layer of blush. Almost every failure mode traces back to too much product in one spot, not too little. The fix is almost always subtraction: thinner layers, fewer products, better placement.
If you’re starting from scratch, prioritize skin prep and a good sheer base before anything else. Everything downstream, blush, brows, lips, is forgiving. A poorly prepped, over-layered base is not. Get that one thing right and the rest of the kit does the rest of the work for you.
— Norman
Ready to Build Your No-Makeup Makeup Kit?
Essencezenith is the direct route to a believable no-makeup makeup look without guessing your way through five different drugstore skin tints first. The catalog is curated specifically around the textures this look depends on: cream blushes, skin tints, and gentle cleansers built for sustainable ingredients, not the heaviest possible coverage.

Start with one product rather than the full kit. A skin tint or a cream blush is the easiest place to test how a formula wears on your skin before committing to more. Read the ingredient list and shade notes on the product page, check the customer reviews for how the finish holds up across a full day, and lean on Essencezenith’s personalized service if you’re between two shades. Every order ships fast, and if a shade or texture isn’t right once it arrives, the 30-day satisfaction guarantee covers a return on anything unused, so trying a new formula doesn’t come with the usual online-shopping risk. Check the shipping details and place your first order today.
Sources
FAQ
Is No-Makeup Makeup Good for Everyday Wear?
Yes. Because it relies on thin, sheer layers rather than heavy coverage, it holds up well for daily wear across most skin types, and technique adjustments for oily, dry, or combination skin make it adaptable rather than one-size-fits-all.
Who Owns No-Makeup Makeup as a Brand?
No-makeup makeup isn’t owned by any single brand. It’s a widely used technique and style name across the beauty industry, and Essencezenith curates products specifically suited to achieving that look through sustainable, skin-first formulas.
Is a No-Makeup Makeup Kit Sold in Stores?
Individual products for this look, skin tints, cream blushes, brow gels, are sold across many beauty retailers both online and in stores. Essencezenith sells its curated selection online with fast shipping and a 30-day satisfaction guarantee on unused items.
What Do You Need for No-Makeup Makeup?
A minimal kit of five items covers most people: a skin tint or tinted moisturizer, a cream concealer, a cream blush, a brow gel, and mascara or a tinted lip balm, applied in thin layers with fingers and a damp sponge.
Recommended
Comments