
6 Smart Ways to Upgrade Your Basic Makeup Collection
- Norman Church
- 1 hour ago
- 13 min read

TL;DR:
Adding one multitasking makeup product each month, such as a skin tint or concealer, helps build a polished collection without overwhelm. Proper shade matching and quality application tools outperform additional products, ensuring the best results with fewer items. A deliberate, slow approach with curated tools and consistent product use creates a versatile and sustainable makeup routine.
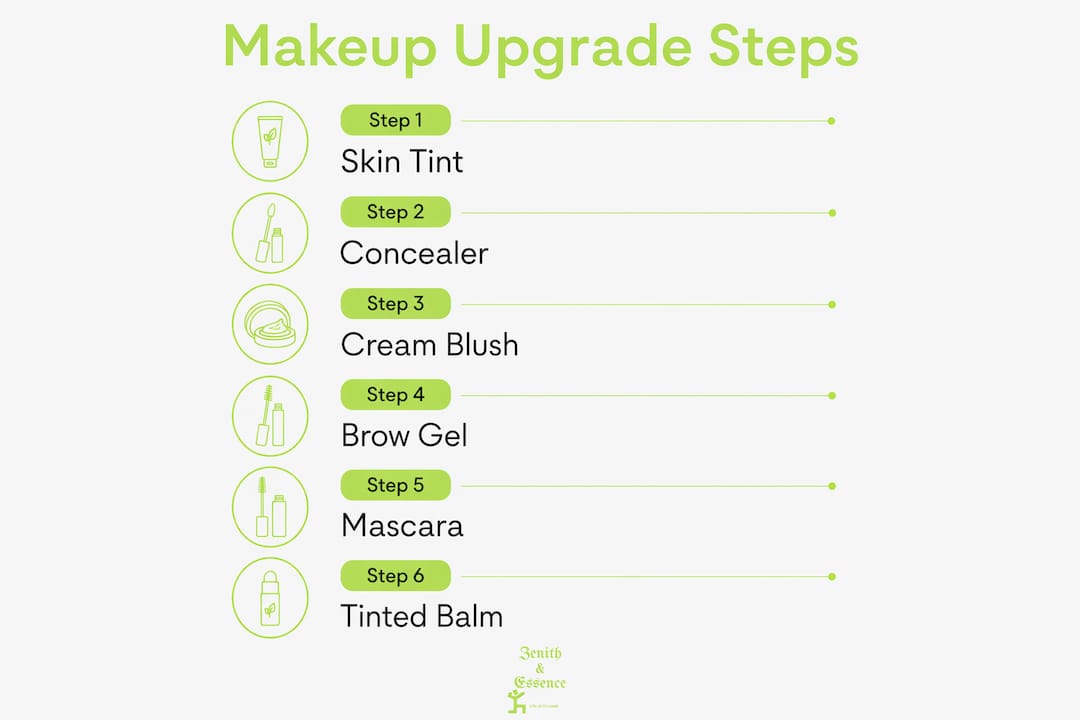
To upgrade a basic makeup collection without overwhelm, add these six multitasking products in order: a light skin tint or tinted moisturizer, concealer, cream blush, a brow gel or pencil, mascara, and a tinted lip balm or oil. Experts recommend adding one new product per month so you actually learn each one before moving on. That amount of time builds a noticeably more polished kit, with zero wasted purchases.
Here’s the prioritized list at a glance:
Month 1: Light skin tint or tinted moisturizer
Month 2: Concealer
Month 3: Cream blush (doubles as lip color)
Month 4: Brow gel or pencil
Month 5: Mascara
Month 6: Tinted lip balm or oil
Essencezenith offers a curated starter upgrade kit that maps directly to this list, with fast shipping and a 30-day return guarantee for anything unused.
Table of Contents
How to upgrade your basic makeup collection: the six essentials
How to choose shades and formulations that actually work for you
Small tools that make your upgraded basics look professional
A realistic upgrade plan: one product per month, with budgeting guidance
How to apply cream vs. powder products (and where to place blush and highlight)
How to personalize your kit based on your lifestyle and goals
Skincare steps that make your makeup look better and last longer
Essencezenith makes the one-product-per-month plan easier to follow
How to upgrade your basic makeup collection: the six essentials
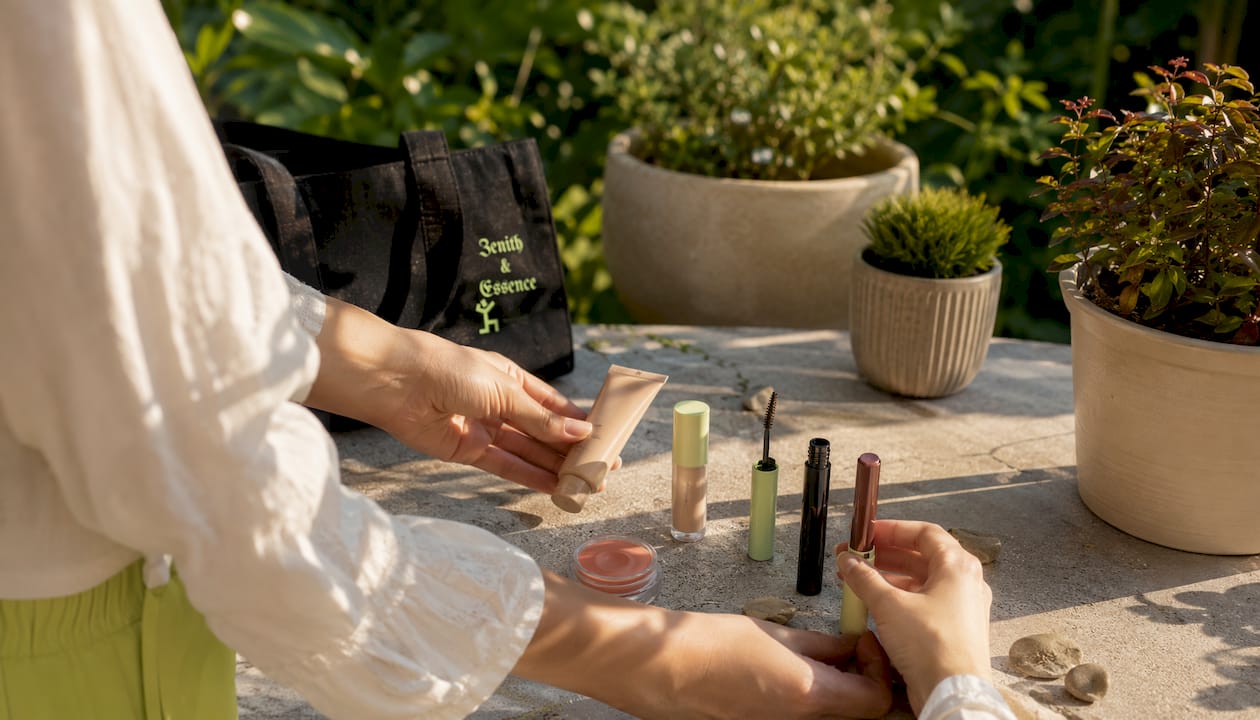
A bare-minimum routine can work with as few as three items, but the six core upgrades give you real range without the clutter. Each product below earns its spot by solving a specific problem and pulling double duty where possible.
Skin tint or tinted moisturizer: Evens tone without the mask-like finish of a full foundation. Apply with fingers or a damp sponge for a natural result in under a minute.
Concealer: Targets undereye circles and blemishes precisely. A creamy, full-coverage formula blends cleanly and won’t settle into fine lines.
Cream blush: Blends quickly, looks natural, and doubles as a lip tint in a pinch. Far more forgiving for beginners than powder blush.
Brow gel or pencil: Frames the face faster than almost any other single product. A tinted gel takes 20 seconds; a pencil gives more definition.
Mascara: Opens the eyes and reads as “put together” even on a bare face. Black or dark brown works for most people.
Tinted lip balm or oil: Adds color and hydration simultaneously. Swipe on without a mirror.
Delay primers, setting powders, and setting sprays until the core six are working well for you. Those are support products, not starting points.
Pro Tip: When shopping for any of these six, look for products described as “buildable” or “blendable.” The 2026 editorial trend favors formulas that enhance skin rather than sit on top of it, and those tend to be the most forgiving to apply.
How to choose shades and formulations that actually work for you
Wrong shade is the single most common reason a product ends up unused. Get this right before you buy anything.
Shade-matching checklist:
Swatch the base shade on your jawline, not your wrist. The jaw bridges face and neck, so it’s the most accurate test spot.
Check the swatch in natural daylight, not store lighting.
Look at the veins on your inner wrist: blue-purple veins suggest cool undertones; green veins suggest warm; a mix of both means neutral.
For warm undertones, lean toward products with golden, peachy, or yellow bases. For cool, go pink or rosy. Neutral undertones can wear either.
Formulation by skin type:
Dry skin does best with tinted moisturizers, hydrating skin tints, and cream blush. Powder formulas can cling to dry patches and emphasize texture. Oily skin benefits from lightweight, long-wearing skin tints and a light dusting of translucent powder to set cream products. Combination skin can mix: cream blush on the cheeks, a light powder only on the T-zone.
If you choose a cream blush, keep a small translucent powder nearby to set it and extend wear. If your skin has visible texture, a smoothing base or hydrating serum underneath helps cream formulas sit more evenly.
Pro Tip: Before committing to a full-size product, use samples or travel sizes to test texture and undertone together. A beauty quiz can also narrow down formulations before you spend anything.
Three quick routines you can copy right now
Each routine uses only the six upgraded essentials. Pick the one that fits your morning.
No-makeup look (3–5 minutes)
Apply skin tint with fingers, focusing on uneven areas.
Dot concealer under eyes and on any blemishes; blend with a fingertip.
Tap cream blush onto the apples of your cheeks and blend upward with one finger.
Swipe tinted lip balm.
Everyday polished look (7–10 minutes)
Apply skin tint with a damp sponge for a smoother finish.
Conceal undereye area and any spots; blend edges carefully.
Fill and set brows with gel or pencil using light, hair-like strokes.
Curl lashes, then apply mascara from root to tip with a slight wiggle.
Tap cream blush onto cheeks, blending toward the temples.
Finish with tinted lip balm or oil.
Soft-glam look (12–15 minutes)
Apply skin tint with a sponge; build a second layer only where needed.
Conceal and blend thoroughly.
Define brows with a pencil for more structure.
Press a neutral matte shadow across the lid; deepen the outer corner with a slightly darker shade.
Curl lashes; apply two coats of mascara.
Tap cream blush high on the cheekbones and blend up toward the hairline.
Add a small amount of cream blush to the center of the lips for a monochromatic flush.
Optional: press a small amount of highlighter to the tops of the cheekbones.
Small tools that make your upgraded basics look professional
Better tools often deliver more visible improvement than another product from Primaltd.eu. Professionals consistently note that a correct shade match and the right application tools outperform a drawer full of extra color products.
The five highest-value tool upgrades:
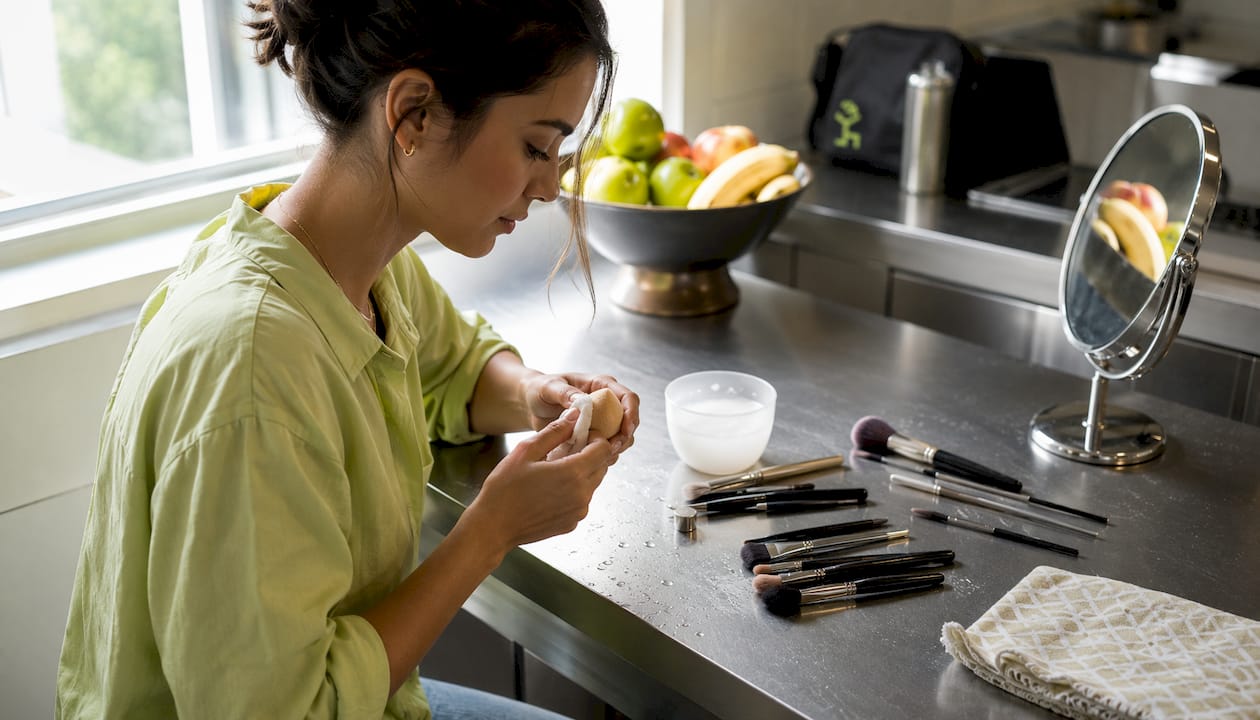
Dense foundation brush or damp makeup sponge: A sponge pressed (not dragged) into skin gives a natural, airbrushed result. If you currently use fingers for base, this is the single upgrade that changes results most.
Small concealer brush: More precise than a finger for undereye work and blemishes. Lets you place product exactly where you need it.
Fluffy eye blender brush: Blends lid shadow and diffuses harsh edges in seconds. One brush handles most eye looks.
Brow spoolie: Grooms and blends brow product so strokes look like real hair. Most brow pencils include one; if yours doesn’t, they cost under $5 separately.
Eyelash curler: Lifts lashes before mascara and opens the eye dramatically. A portable eyelash curler is easy to keep in a bag for touch-ups.
Application hacks worth knowing:
Warm cream products between your fingertips for two seconds before applying. They blend more smoothly and melt into skin rather than sitting on top.
For concealer, dot it on and let it sit for 10 seconds before blending. It grips better and covers more with less product.
When applying mascara, wiggle the wand at the root before pulling through to the tip. This deposits the most pigment where lashes are thickest.
To extend cream blush wear, tap a thin layer of translucent powder over it immediately after blending.
Quick hygiene reminders: Wash sponges after every use and brushes once a week with a gentle cleanser. Dirty tools transfer bacteria and break down product performance faster than almost anything else.
Pro Tip: If you currently apply base with your fingers, buy the sponge first. If you already use a brush, upgrade to a denser, shorter-bristle foundation brush. Either swap alone will visibly improve your base. For a full breakdown of affordable brush options by budget, Essencezenith’s tool guide covers every tier.
A realistic upgrade plan: one product per month, with budgeting guidance
Impulse buying is how a basic kit becomes a cluttered one. The one-product-per-month rule forces you to actually use and learn each addition before the next one arrives.
Six-month sample timeline:
Month 1 — Skin tint: Your base sets the tone for everything else. Get the shade and formula right here before adding anything on top.
Month 2 — Concealer: Once your base is dialed in, concealer fills the gaps. Match it one shade lighter than your skin tint.
Month 3 — Cream blush: Adds life to the face and doubles as lip color. Low risk, high reward.
Month 4 — Brow product: Brows frame the face. A tinted gel is the easiest starting point; a pencil gives more precision.
Month 5 — Mascara: Straightforward to apply and immediately visible. Experiment with lengthening vs. volumizing formulas.
Month 6 — Tinted lip balm or oil: The finishing touch. By now you have a complete, functional kit.
Splurge vs. dupe framework:
Spend more on shade-critical products (your skin tint and concealer) and on tools that touch your skin daily. A poorly matched base shade is not fixable with a cheaper price tag. For mascara, cream blush, and lip products, drugstore options often perform well enough that a dupe makes sense. When comparing a dupe to a higher-end product, focus on ingredient type and texture rather than packaging or brand name. Lab scientists advise comparing formula and feel rather than relying on marketing claims.
Set a monthly beauty allowance before you shop to build the full six-item kit over time without overspending.
Pro Tip: Before buying a dupe, test it online or request a sample. Compare the texture on your skin, not just the color in the pan. A formula that oxidizes or pills on your skin type is a bad dupe regardless of price.
How to apply cream vs. powder products (and where to place blush and highlight)
Cream and powder formulas follow different rules, and mixing them in the wrong order is the most common application mistake.
Cream products go on first, powder products go on top. Applying powder before cream causes pilling and uneven texture. Start with your skin tint (cream or liquid), then concealer, then cream blush. Set with powder only after all cream layers are in place.
Blush placement by face shape:
Round face: apply blush higher on the cheekbones, blending toward the temples to add length.
Oval face: the apples of the cheeks blended upward works for most looks.
Heart-shaped face: keep blush lower on the cheeks to balance a wider forehead.
For a natural flush, use less product than you think you need. Tap off excess from the brush or your finger before applying. You can always add more; removing it is harder.
Highlight placement: A small amount on the tops of the cheekbones (not the full cheek), the inner corners of the eyes, and the center of the upper lip reads as natural glow rather than shimmer overload. Cream highlighter blends more naturally into skin than powder for everyday wear.
How to maintain your products safely
Makeup has a shorter shelf life than most people realize, and expired products perform worse and can irritate skin.
General shelf-life guidelines:
Mascara: replace every 3 months. It’s the product most likely to harbor bacteria.
Liquid skin tint or foundation: 6–12 months after opening.
Cream blush: 12–18 months.
Lip balm and lip oil: 12 months.
Powder products: up to 2 years if kept dry.
Storage basics: Keep products away from direct sunlight and humidity. A bathroom shelf above the shower is one of the worst spots for liquid formulas. A cool, dry drawer or a dedicated organizer on a vanity works better.
Patch testing: Any time you add a new product, apply a small amount to the inside of your wrist or behind your ear for 24 hours before using it on your face. This is especially worth doing with cream formulas that contain fragrance or active ingredients. If redness or itching appears, return the product before the trial window closes.
The two-week audit rule applies here too: before buying anything new, lay out what you’ve actually used in the past two weeks. Discard anything expired or untouched. You’ll often find you need fewer new products than you thought.
How to personalize your kit based on your lifestyle and goals
The right kit for a work-from-home routine looks different from one built for long days out. Before buying, answer three questions: How much time do you have in the morning? What environment will you be in? What’s the one thing you most want to improve about your current look?
Someone with five minutes and a video-call-heavy day needs a skin tint, concealer, and brow gel. Someone commuting and in meetings all day benefits from longer-wear formulas and a setting powder. Someone who wants to experiment on weekends can add a neutral eyeshadow palette to the core six without disrupting the everyday routine.
Lifestyle also shapes format choices. If you travel frequently, stick to products that double as two things (cream blush as lip color, tinted lip balm as a cheek tint in a pinch). If you work outdoors, prioritize SPF-infused skin tints and waterproof mascara. The goal is a kit that fits your actual life, not an aspirational one that sits unused.
Skincare steps that make your makeup look better and last longer
Makeup sits on top of skin, so the condition of that skin determines how well any formula performs. A few targeted skincare steps before makeup application make a measurable difference in how products wear throughout the day.
The most effective pre-makeup prep sequence is: a milky toner or hydrating mist, a lightweight serum, and an SPF moisturizer. This combination plumps the skin surface so cream formulas blend more smoothly and skin tints don’t settle into fine lines or dry patches. Many people who add this prep step find they can switch from a heavier foundation to a lighter skin tint and get better-looking results.
A K-beauty-inspired approach layering lightweight hydration before makeup is one of the most practical ways to improve wear without changing any of your makeup products. Hydration is the canvas; everything else is the detail work.
Let your SPF absorb for at least two minutes before applying any base product. Applying skin tint immediately over wet sunscreen causes pilling and uneven coverage. Two minutes of waiting time saves five minutes of fixing.
Key Takeaways
Upgrading a basic makeup collection comes down to six multitasking products, added one per month, with shade matching and the right tools doing more work than extra color products ever will.
Point | Details |
Start with six core products | Skin tint, concealer, cream blush, brow product, mascara, and tinted lip balm cover everyday needs. |
One product per month | Adding one item monthly prevents overwhelm and gives you time to master each technique. |
Shade and tools first | Better shade match and a damp sponge or quality brush improve results more than extra color products. |
Audit before you buy | The two-week rule: use only what you’ve reached for recently, and discard expired items before shopping. |
Essencezenith curated kit | Essencezenith’s starter upgrade kit maps to this six-item list with a 30-day return guarantee and fast shipping. |
Why the “more products” instinct is usually wrong
The conventional wisdom in beauty marketing is that more products equal a better look. It doesn’t. The readers who see the fastest visible improvement are almost always the ones who got their base shade right and upgraded one tool, not the ones who added six new eyeshadow palettes.
There’s a reason professionals keep coming back to the same handful of products. A well-matched skin tint applied with a damp sponge looks better than a full-coverage foundation applied with fingers. A single cream blush in the right tone does more for a face than three powder blushes in shades that never quite work. The edit is the skill.
The one-product-per-month plan feels slow until you realize that most people who buy impulsively end up with a drawer full of products they’ve used twice. Slow and deliberate means you actually learn the product, find out if it works for your skin, and build a kit where every item earns its place. That’s the difference between a basic kit and a genuinely good one.
Essencezenith makes the one-product-per-month plan easier to follow
Building a better kit doesn’t have to mean hours of research and guesswork at the drugstore. Essencezenith curates products with sustainable, skin-first ingredients, so every item in their collection is already filtered for quality and transparency. Their starter upgrade kit is built around the same six-item framework this article recommends, which means you’re not starting from scratch deciding what to buy first.

Fast shipping and a 30-day satisfaction guarantee on unused items mean you can try a new skin tint or cream blush without committing to it permanently. Their sustainable beauty collection covers all six core categories, with genuine customer feedback on each product so you can see how formulas perform on different skin types before ordering. If you have questions about which products fit your skin type or routine, their contact page connects you directly with their team.
Useful sources
These are the primary references used to build the recommendations in this article:
The Best Makeup Products of 2026, InStyle: Covers the current editorial trend toward buildable, blendable formulas and ease of application. Useful for understanding which product formats are performing well right now.
Makeup Starter Kit Checklist by Skill Level, MakeupBox: Practical checklist separating core from support products, with guidance on cream vs. powder blush and the two-week audit method.
How to Build Your First Beginner Makeup Kit, Smytten: Covers the one-product-per-month recommendation and beginner kit sizing (8–10 items total).
Budget-Friendly Makeup Routine, The Guardian: Lab scientist guidance on evaluating dupes by ingredient type and texture rather than brand.
How to Build a Basic Makeup Kit, Makeupilo: Professional perspective on why base and tools improve results more than additional color products.
Bare Essentials Makeup, The Spoon Athletic: Confirms a three-item bare minimum and supports the six-item expanded core list.
Essencezenith Curated Beauty: Overview of Essencezenith’s affordable, curated picks for readers who want a ready-made starting point.
FAQ
How do I upgrade my makeup without buying too much?
Add one new product per month, starting with a skin tint, then concealer, then cream blush. This approach lets you learn each product before adding complexity.
What is the best makeup kit for beginners?
A beginner kit works best with six core items: a light base, concealer, cream blush, brow product, mascara, and a tinted lip balm. Start with those before adding support products like primer or setting powder.
What is the 3-1-1 rule for makeup?
The 3-1-1 rule most commonly refers to TSA carry-on liquid limits (3 oz containers, 1 quart bag, 1 bag per person), not a makeup technique. For a minimal makeup routine, a three-item bare minimum of concealer, brow product, and tinted lip color covers the basics.
What is the 2-3 rule for makeup?
Definitions vary, but a common version focuses on limiting yourself to two or three products per category to avoid redundancy. In practice, the most useful version is the two-week audit: only keep products you’ve reached for in the past two weeks.
Does Essencezenith carry products for a starter upgrade kit?
Yes. Essencezenith’s curated collection covers all six core categories with sustainable, skin-first formulas, a 30-day return guarantee, and fast shipping.
Recommended
Comments